Thursday, 31 March 2011

Final Animation Preparation

Before I start animating I'm going to do a bit of preparation on body language and walk sequences.

It's important that I have an idea on how people walk with a single crutch as my toy soldier will be animated using one.
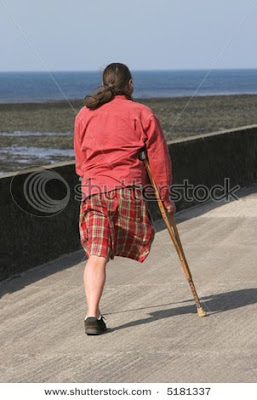

This picture gives an example of the body position of someone using a single crutch when stationary.

I also looked for some videos of people using crutches. I found one of a woman using a single crutch which is exactly what I need.


The video is good, but not perfect. The woman is very skilled at using a crutch whereas my toy soldier will have no experience. However, this is some useful material that I can use when animating.


I have also this video of a long jumper with long leg. I may be animating the hunter hopping around so this video gives an example of the body movement.

I also intend to animate my own walk and run sequences.
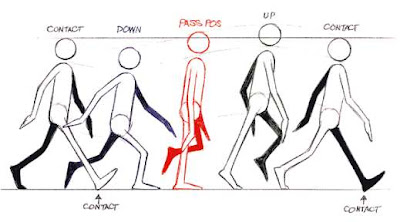

This picture gives me an idea of the walk sequence I will use for my doll character.
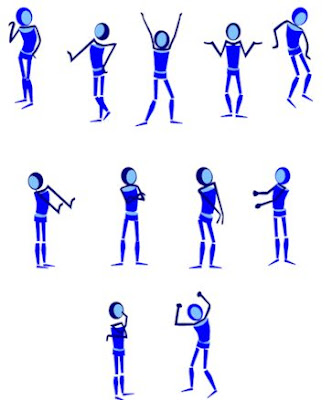

I have here some examples of emotive body language. The fact that they are stick figures makes them extremely useful to me as they resemble bipeds. I may use these as reference while animating.

Although I have found some really useful material for animtion reference, I have something that I will find most valuable.


Yep, it's a mirror. I've been playing around with one to see certain body movements for tricky shots where I cannot find any referece or examples. These include climbing up a crutch on one leg and landing on one leg and falling to the floor.
I also intend to use the mirror for face animation. This will mainly be used for emotion transition.
Prop & Scene Creation

With the character rigging completed I started creating the final assets for my animtion scenes.

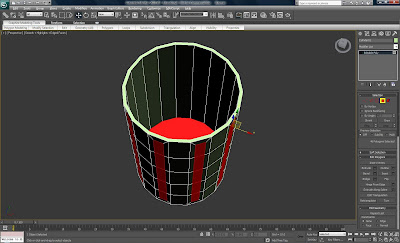
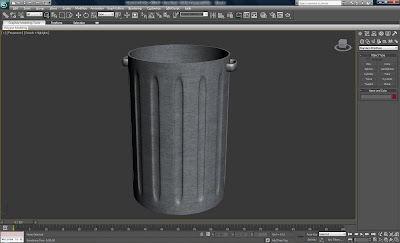
The first prop I made was the bin. To make this model I started with a cylinder. I then selected the top poly and every other set of polys around the cylinder. I then inset and extruded the new polys.


I then selected two sets of two polys at the top of the cylinder and extruded them out and round, connecting them to form handles.
I added a smooth modifier and set the smooth selection on the polys to add sharp connection edges on the top, bottom and handles of the bin.
I finally added a UVW Map and applied a metal material with edited specular and gloss parameters.


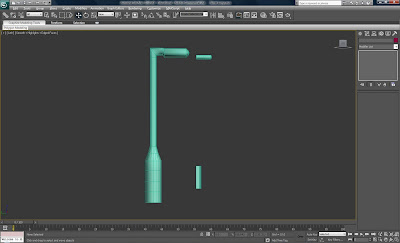
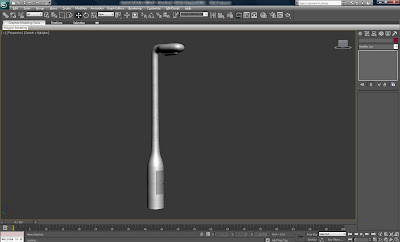
The next prop is the lamp post. To create this model I started with a cylinder and extruded scaled it to form the pole. I then deleted the end poly and extruded it round to form the head of the lamp.
I also created a box which was tweaked to form the lamp post hatch and two cylinders. One was scaled to form the lamp bulb, the other to form the hatch handle.


I added a smooth modifier and set the smooth selection on the polys to add sharp connection edges on the bottom of the lamp post.


I finally added a UVW Map and applied a metal material with edited specular and gloss parameters.

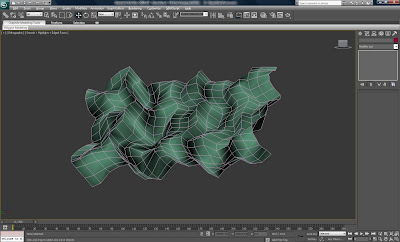
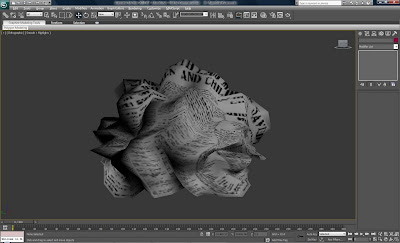
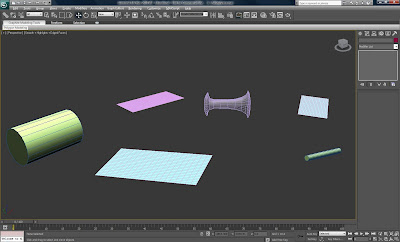
To create the newspaper I made a plane with multiple segments. I then added a noise modifer and applied a newspaper material.


I then added two bend modifiers which were tweaked to form a crumpled up newspaper.


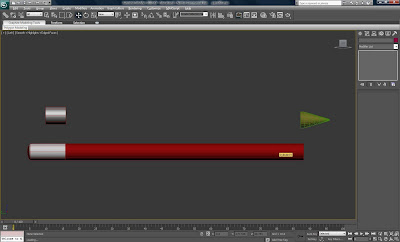
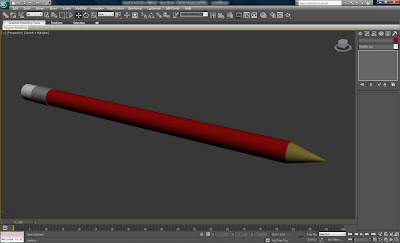
To form the pencil prop I made two cylinders and a cone. I rounded off the end of one cylinder and applied materials to each of them.


Finally, I placed all the models together to form the pencil.


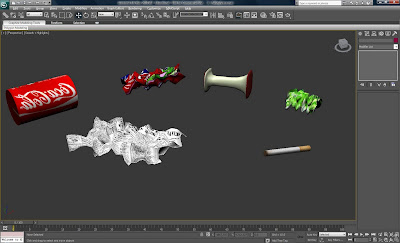
I needed some actual rubbish in the bin so I made a few models.
The paper and wrapper props were planes with multiple segments, the cigarette and drink can were simple cylinders and the apple core was box that was scaled.


I then added noise and bend modifiers to the paper and wrapper planes.
I finally added UVW maps to the models and added materials.


With all the props made all thay was left was to make the scenery. I did this by creating three planes. One had multiple segments and a noise modifier. To this a brick material was added. To the others a floor and town street modifier was added.
I then duplicated the planed and positioned them as needed.


With all the models needed created I am now ready to start animating.

Thursday, 24 March 2011

Rag Doll Rig

For my rag doll, the first step was to create a biped and scale it to fit inside of the model.


I then added a skin modifier to my rag doll model and added the biped I had just created. I spent a long while skinning the vertices of my model to the biped, paying a lot of attention to the complicated thigh and hips area.


To rig the face of the rag doll I duplicated the model multiple times and changed a single feature of each one of the models face. I did this until all the required components had been created.


After I had created all the different facial expression components I made a morph modifier on the rag doll model and added all the models. I then spent some time making test emotions.


I was very happy with how these turned out and feel they would been good enough to communicate the character's emotion to the audience.

This completed the modelling and rigging of my rag doll character which is now ready to animate.

Toy Soldier Rig

Now the character models were completed, the next step was to rig my models ready for animations. I first created a biped and scaled it to fit inside my toy soldier model.


I then added a skin modifier to my toy soldier model and added the biped I had just created. I spent a long while skinning the vertices of my model to the biped, paying a lot of attention to the complicated thigh and hips area.


After I finished skinning the model, I made a quick walk and rendered it to make sure that the model deformed properly.


To rig the face of the toy soldier I duplicated the model multiple time and changed a single feature of each one of the models. I did this until all the required components had been created.


After I had created all the different facial expression components I made a morph modifier on the toy solfier model and added all the models. I then spent some time making test emotions.


I was very happy with how these turned out and feel they would been good enough to communicate the character's emotion to the audience. I animated a very short clip to test a few emotions and the movement of the toy soldier.


This completed the modelling and rigging of my toy soldier character which is now ready to animate.

Facial Animation Preparation

Before I started to rig the facial expressions of my characters I decided to look on the internet for different pictures of complex facial emotions. I would use these as a guideline to form emotions and expressions for my characters.


I found these useful but as I was not animation a human or highly orgaic character I decided to look for some more 'cartoony' facial emotions that might be more useful to me.


These were more useful to me but as the facial features of my characters were limited I carried on searching for reference pictures that would be more useful still. I then chanced upon a set of very basic cartoon emotions which suited my needs perfectly. They were ideal because all the facial features were detached like those on my character models.


I used this set of facial emotions as a guide for rigging the faces of my characters.

Friday, 18 March 2011

Doll Modelling

Here are the steps I took in modelling my broken doll character.


I started by making a low poly sphere and tweaking the vertices in order to make the head of my rag doll. I then converted the sphere to an editable poly, deleted the right half of the model and added a symmetry modifier. The finally added a smooth modifier.


I then selected and deleted some polys on the bottom and left side of the head, these were then extruded to for the neck and ears.
I then made a cylinder which was scaled to form the eye, a sphere that was scaled and the right side deleted to form the nose, and a box what was scaled and tweaked in editable poly to form the eyebrow. These models were then attached to the head model.


I then selected some of the polys at the top of the head and copied them whilst scaling them up. I deleted the right hand side of this new model and added a smooth and symmetry modifier.
I selected two polys on the upper left hand side of the model and extruded them out, scaling the vertices as I went, to form the pigtails bunches.


I made two cylinders which were scaled to form the pupil and mouth, these were attached to the head model, along with the hair which I spent some time scaling the pigtails.
I then started to extrude the edges down from the neck to form the shoudlers, arms and chest.


I then extruded the polys down from the chest to form the body of the doll. I selected the new polys at the top of the body and some polys that looped over the shoulders that I planned to form the straps. These polys were then inset, extruded out and scaled. This formed the dress of the doll.


I selected the edges that looped around the arms and extruded them down to form the arm. I finished extruding them by tweaking the vertices to form a hand. I selected a poly on the under side of the hand and extruded it out multiple times to form the thum.


The final step in modelling the doll character was to create a cylinder which I scaled and positioned inside the doll model. I extruded the edges of the cylinder down and tweaked the verts. I extruded the edges out to form the shoe.
The cylinder was then added to the doll model.
Finally, I deleted most of the right arm and capped the end.


I then made a number of materials which I added to the different parts of the model.

Again, I chose to model and texture the model this way because I feel that it adds to the 'cartoony' theme of my animation and makes the model look more like a rag doll, than something that is supposed to be organic.

I am happy with this model and feel that it will lend itself to the story and theme of my animation.

Toy Soldier Modelling

Here are the steps I took in modelling my broken toy soldier character.


I started by making a cylinder with multiple segments. I then converted it to an editable poly and used the scale and extrude tools to form the shape of the soldiers body, collar and belt.
I then cut this model in half down the Y axis, added a symmetry modifier and a mesh smooth modifier.


I then repeated the above step without smooth or symmetry modifier to create the head. I then attached this model to the body cylinder to form the head.
I also created a new cylinder which I made an editable poly and extruded it multiple times to form the leg and boot.


The above stage was then repeated once more to make the arm and the hand of the toy soldier. I took care on the arm and leg to include topology that would allow me to skin the model with ease.


I then attached the leg, arm and hand to the toy soldier model and collapsed the symmetry modifier to the editable poly modifier. I was not able to delete and tweak the verticess of the left leg to make the broken leg.
I spent some time tweaking the vertices of the hat to reach the final shape. I also made a buckle and feather out of two boxes that I attached to the toy soldier model.
Finally, I deleted some faces on the face and extruded the edges out to create the nose.


I then spent some time editing the vertices of the boot, creating a mudflap by extruding some of the polys out.
I then created a number of cylinders which were scaled and attached to the toy soldier model to form the buttons, eyes, pupils, mouth, bluckle pin and shoulders. I also formed a belt buckle, eyebrows and moustache from boxes which were scaled and attached to the toy soldier model.
The final stage of modelling was to delete planes on the side of the head and extrude the edges out to form the ears.


I then made a number of materials which I added to the different parts of the model. The specular levels were edited to form more shiney points on the model.


I spent a qhile looking for an appropriate wood texture for the broken stump and added a UVW map modifier. to make sure the texture sat on the model properly.

I chose to model and texture the model this way because I feel that it adds to the 'cartoony' theme of my animation and makes the model look more like a toy soldier, than something that is supposed to be organic.

I am happy with this model and feel that it will lend itself to the story and theme of my animation.

Thursday, 17 March 2011

Character Development

I have decided to redesign the two characters for my 3d animation.

The toy soldier I still want to be an old fashioned soldier. However, I feel that it should look more like a 'Nutcracker' soldier.
Here are some example images I have found online.


Taking these pictures into account I have arrived at the final design for my toy soldier.


I have decided to change the doll from a 'Barbie' to a rag doll. This is because I think the model would look better for the style of animation I am doing.
Here are some example images I have found online.


Taking these pictures into account I have arrived at the final design for my doll.

Storyboards

Here are the storyboards for my animation. This is the final version but they may be subject to slight changes while animating.

The pictures are bad quality, but that is due to the lack of a decent camera. All original design and planning images will included with the print of this blog.


1. A bin is revealed in a dark alleyway under light from a street lamp.
2. A broken toy soldier is dropped into the bin
3. The toy soldier wakes to find himself alone, scared and confused in a strange place.
4. The toy soldier jumps down onto the floor and lands hard on his front.


5. The toy soldier looks around his surroundings in fear and confusion.
6. The toy soldier then picks up a pencil and uses it as a crutch.
7. A newspaper is revealed to be rustling.
8. The toy soldier jumps looking for the noise.


9. The newspaper is revealed again to be rustling even more.
10. The toy soldier approaches nervously holding the pencil as a weapon.
11. The newspaper is pulled off to show a broken doll shocked and scared to see a toy soldier.
12. Shocked, the soldier falls to the ground.


13. The toy soldier tries to stop the doll from running away and fails.
14. From a safe place the doll spies on the toy soldier despairing on the ground.
15. The doll approaches the toy soldier and offers a hand which he accepts.
16. The doll and toy soldier then walk off into the night together.